Are you unsure HOW-TO remove and/or install your new emblems? If so, you've come to the right place. We have years of experience dealing with full replacement emblem/badges and will impart our knowledge, tips and tricks on the following page!
Firstly, it's important to note when dealing with Wheel Cap Emblems, Steering Wheel Emblems, LODEN "Metal Skin" overlay badges and various other Accent Emblems, there is no learning curve, ANYONE can install safely and securely with the pre-affixed 3M adhesive backing without the need to remove the OEM badges! The below guide pertains only to FULL REPLACEMENT BADGES (ie: Badges which require the standard equipment OEM badges be fully removed prior to the installation of your new badges).
**If you have selected FULL REPLACEMENT BADGES, below you will learn how to:
1.) Quickly and easily remove your existing OEM badges,
2.) Properly prepare the vehicle surface to accept the new badges
3.) Install your new badges
4.) Care-for your new badges to ensure they look amazing years down the road.
READY? Let's get started!
STEP #1: TOOLS
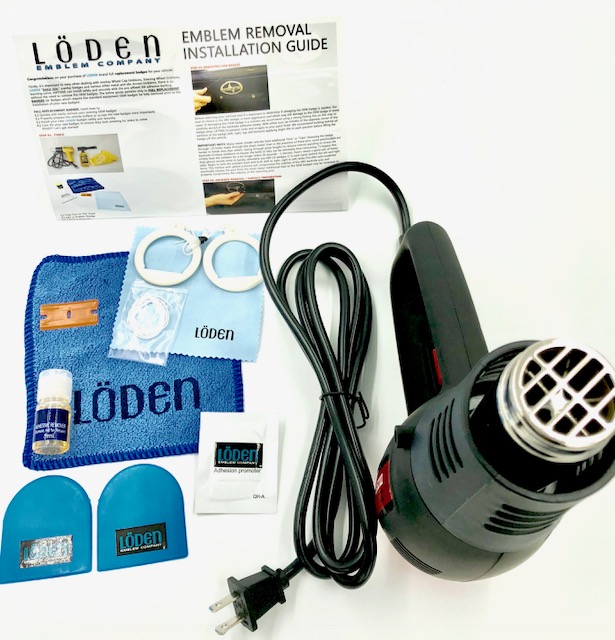
1.) Heat Gun or Hair Dryer
2.) ABS or Rubber Wedge
3.) Adhesive Remover (GooGone or other)
4.) Microfiber Towel
5.) ABS Razor Blade
6.) Adhesion Promoter
7.) Floss or Fishing Wire (optional)
8.) Heavy Duty Gloves (optional)
**Purchase any needed tools from our TOOLS & CARE section HERE
***IMPORTANT TOOL CAVEATS***
*Heat processing times vary between Heat Gun and Hair Dryer
*ABS wedges are only recommended for badge removals on metal car panels (not ABS or Carbon fiber)
*Microfiber Towel should not be replaced with a standard terry towel
*String Emblem Removal Tool (or waxed dental floss) is only recommended for "letter emblems" not OEM "badges"
(More in-depth information on each of these caveats listed below..)
STEP #2: HEATING OEM BADGES
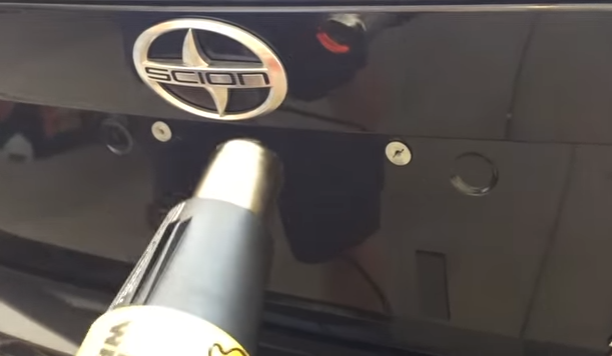
A.) VERY IMPORTANT. Before you begin heating your OEM Badges (to loosen the backside adhesive) it's extremely important to identify the MATERIAL underneath your badge! Is your badge placed on SHEETMETAL, ABS PLASTIC or CARBON FIBER? The answer to this question will determine various factors going forward. Good news is most OEM badges are placed onto SHEETMETAL, which is what you should be hoping for. ABS PLASTIC and CARBON FIBER (more the UV Coating placed over carbon fiber) is much more sensitive to HEAT. Considering your OEM badge is placed on SHEETMETAL, let's proceed.. (additional notes on ABS and CARBON FIBER below).
B.) General Rules of Thumb when heating OEM Badges:
*Keep the heating tool 6-10" away when on HIGH MODE
*Keep the heating tool 4-6" away when on LOW MODE
*Keep CONSTANT MOTION when heating OEM Badges (circular and sweeping motions only)
*Considering Heat Gun, the processing time should be between 1-1.5 minutes for the adhesive to fully loosen
*Considering Hair Dryer, the processing time should be between 2-2.5 minutes for the adhesive to fully loosen (on high)
*When removing OEM Badges you should be resigned to the fact you may melt, crack or break the badge. However, if keeping the badge in-tact is a top priority it's recommended to heat on a lower setting for a bit longer. This will not guarantee the badge be preserved, however will improve your chances. More on this subject below..
STEP #3: REMOVING OEM BADGES
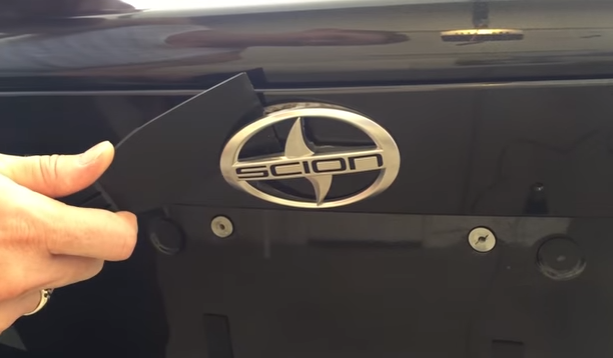
Before selecting your removal tool it's important to ask yourself if you care to salvage the OEM badge. Our weapon (tool of choice) is the ABS wedge, which is a more aggressive tool which may risk damage to the OEM badge in some cases. If damaging the OEM badge is a concern we recommend using a strong fishing line on this step to carefully work/cut the backside adhesive slowly. With either tool, be mindful of the opposite corner of the badge when LIFTING to prevent nicks and scrapes to your paint finish. We recommend working behind all sections of the badge (left, right, top and bottom) applying slight lifts to each position before "going in for the kill".
NOTE: Many newer model vehicles have additional "Pins" or "Tabs" fastening the badge through (2) holes made through the sheetmetal. Even in the presence of these pins, some year/models are harder to break-free than others. Going through great lengths to access the backside of these emblems to loosen the bolts or tabs is not in your best interest. Simply heat the emblem for a bit longer (30 seconds - 1 minute). Here's where a good pair of heavy duty gloves would come-in handy.. otherwise use 2 wedges (1 in each hand, behind the left and right center position. Begin to rock the emblem back and forth (left to right, right to left) while PULLING with moderate force. This motion with added pressure will compromise the stability of the ABS backside pins and eventually release the pins from the sheetmetal.
STEP #5: ADHESIVE REMOVAL / SURFACE PREPARATION
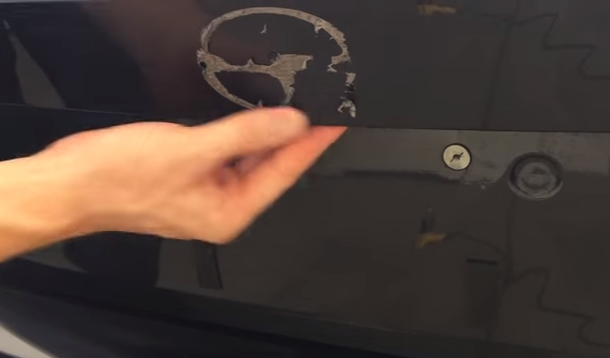
These are the MOST IMPORTANT yet most overlooked steps. Properly removing the left-over OEM adhesive and residue PRIOR to the installation of your new emblem is critical to ensure a secure fitment which will last the life of your vehicle.
This step consists of 3 phases:
1.) Remove OEM adhesive:
While the left-over OEM adhesive is still hot "roll" the adhesive with your thumbs, remove as much as possible before the adhesive cools. Move quickly and be careful not to burn yours fingers. If you have sensitive skin and/or stubborn adhesive an optional ABS plastic razor blade can be used to scrape-away the bulk of 3M, however be careful not to scrape your paint finish (using an ABS razor blade properly requires skill and caution). However, if your new emblem will fully cover the adhesive area there's no need to worry about blemishes.
2.) Apply Adhesive Remover:
Once the bulk of OEM adhesive has been removed (or removed to the best of your ability) proceed with applying the adhesive remover on the microfiber tower (Note: Microfiber towels work much better than standard terry clothes for this task). Apply a liberal amount of adhesive remover and allow to soak-in for at least 5 minutes before working the adhesive with the microfiber towel until the remainder of adhesive residue has been removed completely.
3.) Prepare Surface:
Once all adhesive residue has been successfully removed, proceed with cleaning the area with soap and water, then apply the Rubbing Alcohol to the vehicle surface to properly and completely remove all traces of the oily adhesive remover. Your new emblem is now ready to be installed!
STEP #6: INSTALL YOUR NEW EMBLEM!
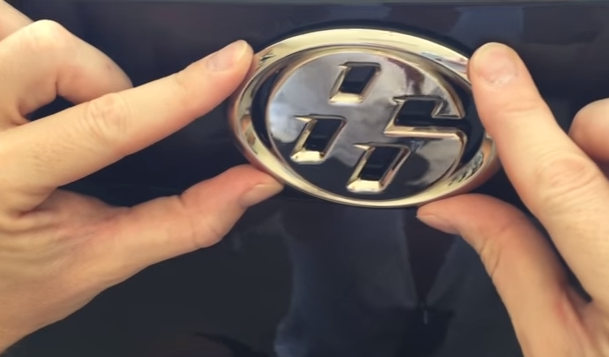
1.) Prior to removal of the 3M backing, perform a few test alignments to get comfortable with your planned placement.
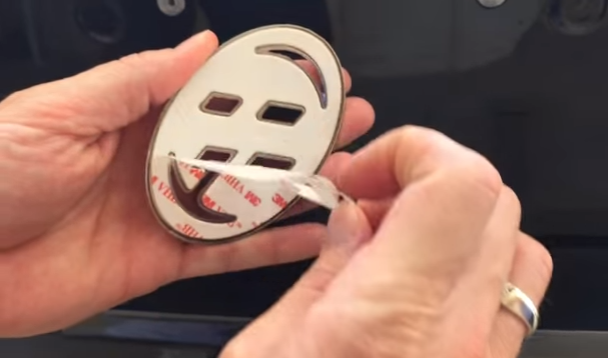
2.) Fully remove the 3M protective film from the backside of your new emblem
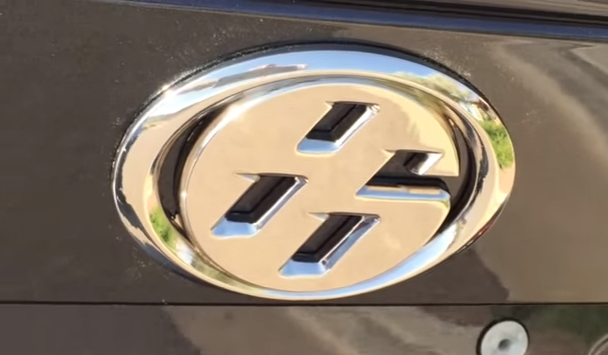
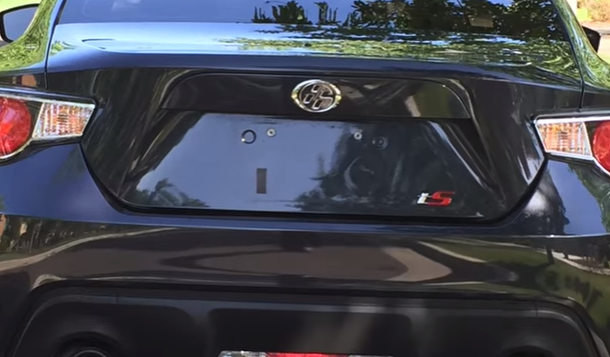
3.) ENJOY the new, exotic appearance of your vehicle! Don't forget to apply gentle pressure for approx 1-2 minutes to ensure the new badge has made full contact with the vehicle surface and fully bonds. It's recommended to wait 24-72 hours before washing the car.
**Additional Tips:
Do not power-wash your new emblems. Always hand wash, lightly polish chrome plated badges with a microfiber tower or pat dry custom painted badges (never scrub custom painted badges, pat wash and pat dry)
It's recommended to install your new emblem in 70+ degree temperature (approx 20 celsius). If you live in a cold climate be sure to gently heat the surface of your vehicle (only where the emblem will be placed) prior to installation. You should also make efforts to keep your vehicle warm and protected for 1-2 days post installation as immediately subjecting your new emblem to extreme cold/snow could adversely effect the longevity of the adhesive bond. Additionally, if you live in a cold/snowy climate and your vehicle is not garaged it's critical to invest in a CAR COVER. Do not leave your vehicle/badges directly exposed to frigid wind and/or snow pile-up. Furthermore, if your vehicle is exposed to road salts (used to melt snow) be mindful these salts are known to eat-through chrome plating and deteriorate custom paint finishes. Clean your emblems regularly if exposed to road salts.
***ABS PLASTIC or CARBON FIBER NOTES***
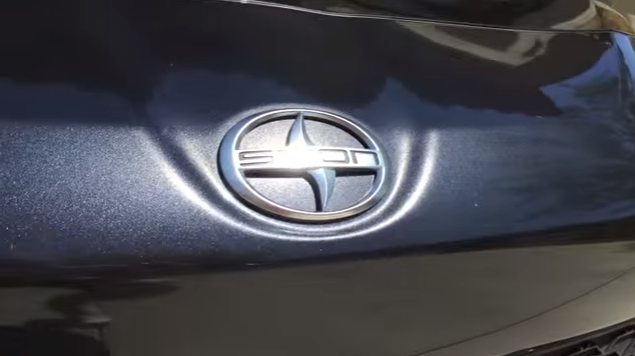
As mentioned in our removal instructions above, extra precaution is required when removing badges from ABS Plastic or Carbon Fiber (bumpers, hoods, trunk lids, fenders, etc). The above pictured Scion FRS front badge is a prime example as the OEM badge is placed on an ABS plastic bumper. Furthermore, the deep bumper indention raises the risk level of potential blemishes caused during the removal process.
*General Rules of Thumb when removing badges from ABS or Carbon Fiber panels:
*Keep the heating tool 6-10" away on LOW MODE
*Keep CONSTANT MOTION when heating (circular and sweeping motions only)
*Considering Heat Gun, the processing time should be between 30 seconds - 1 minute
*Considering Hair Dryer, the processing time should be between 1 minute - 1.5 minutes
*DO NOT use an ABS wedge to remove OEM badges from ABS or Carbon Fiber surfaces
*Opt for either heavy duty waxed floss or fishing line to cut through the backside adhesive
*Use extra precaution around curves and indents, blemishes to the paint can occur easily
